dulcis serenus

Just another WordPress.com weblog

A Thank You and Some Homemade S’mores April 11, 2011

As I’m sure you remember, on March 30th I contributed to an online bake sale that was being organized by Sabrina over at The Tomato Tart to benefit earthquake, tsunami, and nuclear crisis victims in Japan.  Despite some technical difficulties with her site on the day of the bake sale, we still managed to not only meet the goal that Sabrina set, but triple it!  Every single item sold and the Online Bake Sale for Japan managed to raise $8,269 to be donated to Second Harvest Japan!  Raising this amount of money is truly amazing.  I’m completely overwhelmed by the charity of others; everyone who participated, from the bakers to the bidders, contributed to the success of this bake sale and I am truly thankful for having been a part of it.  That being said, if you bid on something for the bake sale and did not win, you can still donate to the cause.  Sabrina set up a fundraising site over at Give Forward that will continue to raise money until June 10th.  She has set a new goal of $10,000.  Anything you could spare would be greatly appreciated as Second Harvest Japan will contribute $1,000 in food for every $100 donated.  That means if we manage to raise $10,000, they will donate $100,000 worth of food, which is a staggering amount.

I would like to thank everyone who bid, especially Angele, Karen E., Julie, Karen S., Tali, Kim, and Rose for their winning bids.  Thank you ladies for contributing to a good cause!  I will be sending out your sweet treats soon.  If you were one of my winning bidders and don’t see your name here, that’s because Sabrina hasn’t received your paypal yet.  Be sure to send it soon or contact Sabrina at bakesale@thetomatotart.com.

So, that was the Thank You, now on to the S’mores!

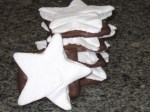
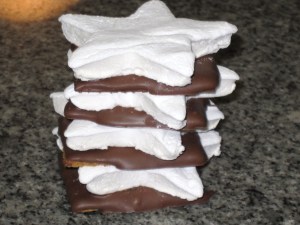
One of the items that I contributed to the bake sale was Homemade S’mores.  Now, one could argue that all s’mores are homemade, but I deem these “homemade” because they start with the Homemade Marshmallows recipe from one of my favorite dessert cookbooks Sticky, Chewy, Messy, Gooey: Desserts for the Serious Sweet Tooth.  I love this cookbook because it is filled with tons of goodies that truly live up to the title.  My only wish is that it had more pictures: I love a cookbook that has a picture to go with every recipe. After I made these for the first time, I decided that homemade marshmallows are a necessity in life; they are just so much better than store-bought.  They’re soft and pillowy and just slightly chewy, plus you can cut them into any shape you want.  (I prefer stars.)  Homemade S’mores are the most requested sweet from all of my friends: I make them for Christmas, birthdays, graduations, random Tuesdays, any occasion I can think of.  The marshmallow aspect of the S’mores is a bit labor intensive (you need to use a stand mixer because they have to beat for 15 minutes and the completed marshmallows have to set for 8-12 hours before cutting), but the time it takes is completely worth the end result.

Here’s what you need:

marshmallows:

1 cup cold water

3 Tbls unflavored gelatin

2 cups granulated sugar

3/4 cup light corn syrup

1/4 tsp salt

2 Tbls vanilla

cornstarch and powdered sugar for dusting

s’mores:

graham crackers

chocolate almond bark

Here’s what you do:

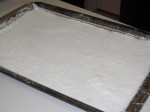
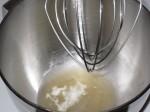
Generously dust a large jelly roll pan with cornstarch and set a side.  If you prefer thicker marshmallows, use a 13×9 cake pan.  Pour 1/2 up cold water into the bowl of a stand mixture and sprinkle in the gelatin allowing it to absorb all of the water.  This will take about 45 minutes.

While gelatin is absorbing, combing the remaining 1/2 cup water, granulated sugar, corn syrup, and salt in a large saucepan.  Heat the mixture over medium heat, stirring occasionally until the sugar dissolves.  Increase the heat to high and let the mixture come to a boil.  Cook the syrup, without stirring, until it reaches 240 degrees on a candy thermometer.

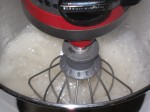
Remove the syrup from the heat and slowly beat it into the dissolved gelatin with the whisk attachment on your stand mixer on low speed.  Increase the mixer to high and continue beating until the mixture is very thick and white but still warm, about 15 minutes.  Beat in the vanilla.  (You could use a handheld mixer, if you want, but 15 minutes is a long time.  Believe me I have tried.)

Pour the marshmallow mixture into the prepared pan and smooth out with a spatula or your hands.  It works best if you spray your hands with cooking spray and slowly pat it out.  Dust the top with powdered sugar.

Let the marshmallows stand, uncovered at room temperature, for 8-12 hours to firm up.  Cut into squares or fun shapes.

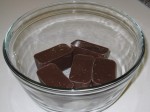
In a glass bowl, melt 5 to 6 squares of chocolate almond bark according to microwave directions on package.

Line your work surface with waxed paper and prepare your graham crackers.

One at a time, dip the top of each graham cracker in the melted almond bark, lay chocolate-side-up on the waxed paper, and immediately place one marshmallow on top of the chocolate.  Let the s’mores cool until set and store in an air-tight container.


Jam, Jam, and more Jam March 25, 2011

Filed under: fruit,jam — dulcisserenus @ 3:36 pm
Tags: , , , ,

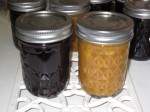
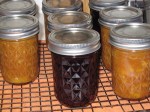
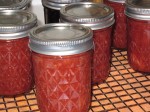
Jam is something I always have in my pantry.  It’s so very versatile.  I particularly love to use it to dress up cookies.  I’ve made jam before, but have never canned it, so this was a learning experience for me.  I spent tons of time searching the internet for the proper procedure and realized, after searching many sites, that it was really not that complicated.  You just have to make sure that everything is sterilized, place hot jam in hot jars, and be sure to boil them for the recommended amount of time.  You can make your own jams in any flavors you want, but I chose: Strawberry Balsamic, Lemon Curd, Mango Cinnamon, and Blueberry Lime.  Now, I know that Lemon Curd isn’t a jam, but I just love it so much that I had to make it.  I used Ina Garden’s recipe for the Lemon Curd and doubled the amounts.  This Set of Four Jams is up for bid on March 30th over at The Tomato Tart, so be sure to stop by and bid; there will be four sets available, so your chances of getting one will be pretty good.  Because they have been canned, they will last up to a year, but I expect they will be long gone before then.  Except for the Lemon Curd, they are egg and dairy free.

Here’s what you need:

6 cups fruit (fresh or frozen)

1 to 1 1/2 cups sugar depending on the sweetness of your fruit

4 Tbls cornstarch

2 Tbls spices or seasonings (cinnamon, lime zest and juice, or balsamic vinegar)

Here’s what you do:

First wash the jelly jars.  The websites recommended using a dishwasher to sterilize the jars and to keep them warm on the dry setting.  Next, prepare the lids by placing them in simmering water and fill your canning pot with enough water to cover your jars by 1 to 2 inches and bring it to a simmer, so it will be hot when you are ready to boil the jars.  Also prepare your canning equipment: a canning funnel, lid lifter, and jar lifter.  (I bought a kit)

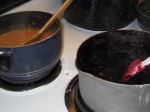
Place the jam ingredients in a medium sauce pan.  Cook over medium heat stirring occasionally until they begin to boil, about 12-14 minutes.  Boil the jam for about 5 minutes, stirring constantly, until the jam is thick.

Once the jam is thickened, you need to blend it using an immersion blender (if using a regular blender, be careful because the jam is very hot) and return it to the stove to stay warm.

Time to fill your jars!  Remove hot jars from the dishwasher (I worked with two at a time) and place near stove.  Using canning funnel, fill jars with hot jam.  Be sure to leave head space at the top of the jars and make sure that there aren’t any air bubbles.  Using the lid lifter, retrieve lids from simmering water and place onto jars.  Seal with a metal ring.

Once you have enough jars to fill your canning pot, start placing the jars in the pot using the jar lifter.  Increase the stove to high heat to bring the water to a boil.  Once the water boils, cover and boil the jam jars for about 10 minutes.
Remove the boiled jam jars from the canning pot using jar lifter and place on wire rack to cool in a non-drafty place.  Leave jars to sit for 24 hours without tilting or moving them.

Any jars that do not seal properly need to be refrigerated and used first.  The sealed jars will last up to a year.


Vegan Shorbread Cookies March 24, 2011

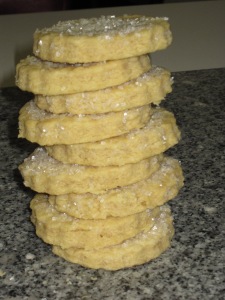
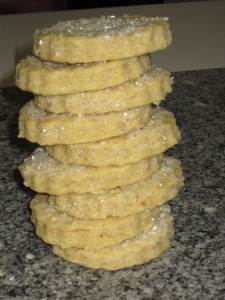
Theses Vegan Shortbread Cookies are the second installment in a short series entitled: “What I’m Baking for the Online Bake Sale for Japan,” and they are amazing!  They are like pecan sandies without the pecans: they are crunchy and slightly crumbly with the buttery goodness of a regular shortbread cookie, but without the dairy and eggs.  I love them and I know you will, too.  I sent some in my boyfriend’s lunch yesterday and he texted me after lunch to tell me that they were “of the chain.”  They get their buttery taste and flaky crumble from butter flavored vegetable shortening and are made with raw sugar to give them a little more crunch.  They’re especially good with a little jam on top!  (Which will be the subject of my next post.)  If you win these cookies in the silent auction on March 30th, you will receive 20 shortbreads in a decorative tin.

Here’s what you need:

1 cup sugar (I used raw sugar)

2 2/3 cups flour

1 cup butter flavored vegetable shortening, very cold (I put mine in the freezer for a couple of hours)

4 Tbls water

1 Tbls vanilla

Here’s what you do:

Place the dry ingredients into a large bowl.  Cut the vegetable shortening into the dry ingredients using a pastry cutter until the shortening is in very small pieces.  Add the water and vanilla and mix well.  I usually start out mixing with the pastry cutter and finish by using my hands to combine everything into a ball.

Roll out the cookie dough on a floured surface until it is about a quarter inch thick.  Cut out rounds with a cookie cutter, re-rolling the dough a couple of times to use it all.

Dip the top of the cookies in sugar sprinkles and place on a greased cookie sheet.

Bake 350 degrees for about 18-20 minutes.  The cookies will puff up slightly and be lightly browned around the edges.  Remove to a wire rack to cool completely.  While they are warm, they will be soft and slightly doughy in the center, but will crisp up as they cool.

Makes about 20, 3 inch cookies.


Bake Sale for Japan Contributions! March 23, 2011

I have finally decided what I will be contributing to the Online Bake Sale for Japan!  I thought I would give you a little sneak peak of my contributions with some info on each.  Recipes will follow shortly.  Be sure to check the site in the days leading up to the auction on the 30th to see all of the treats up for bid.

The first time I made this Whole Wheat Vegan Banana Bread I fell in love with it.  I now feel the need to make it about once a week.  Sometimes I even make two and store one in the freezer in case I’m having a banana bread emergency and just need to eat some…right now.  This bread is moist and slightly dense, as any good banana bread should be, and completely free of eggs and dairy.  (Two loaves available.)

If you love the crunch, crumble, and buttery goodness of shortbread cookies, but don’t eat dairy or eggs, these Vegan Shortbread Cookies are for you.  They get their buttery taste and flaky crumble from butter flavored vegetable shortening,  are completely egg and dairy free, and made with natural, raw sugar.  They’re especially good with a little jam on top!  You will receive 20 shortbreads in a decorative tin.

Jam is something I always have in my pantry.  It’s so very versatile.  I particularly love to use it to dress up cookies.  This Set of Four Jams would be a perfect addition to your pantry.  The flavors include: Strawberry Balsamic, Lemon Curd, Mango Cinnamon, and Blueberry Lime.  These jams have been canned and will last up to a year, but I expect they will be long gone before then.  Except for the Lemon Curd, they are egg and dairy free.  (Four sets available.)

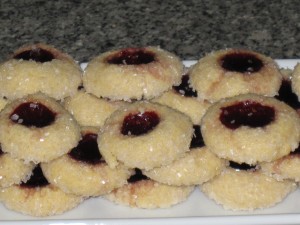
Whenever an overwhelming urge to bake cookies starts to come over me, I make Blackberry Jam Thumbprints.  They are seriously delicious and everyone loves them.  They are soft, crumbly cookies with a sweet jam center.  The cookies are rolled in white sparkling sugar before baking to give them a little crunch.  These bite-sized cookies are so good I could easily eat a dozen in one sitting, so I am going to ship you three dozen in a decorative tin.

Homemade marshmallows are a necessity in life; they are just so much better than store-bought.  They’re soft and pillowy and just slightly chewy, plus they make the cutest S’mores!  Homemade S’mores are the most requested sweet from all of my friends.  I’ll be shipping a dozen of these in a decorative tin to ensure the marshmallows stay fresh.


Bake Sale for Japan: Vegan Banana Bread March 21, 2011


As I stated in my last post, I’m participating in an online bake sale to benefit earthquake and tsunami victims in Japan.  Sabrina, from The Tomato Tart, is the organizer of this amazing and generous idea and she has brought together a very talented group of bakers that are donating their time, supplies, finished products, and shipping costs to this cause.  The silent auction will be taking place on her site on March 30th, so be sure to stop by and bid!  If you’re interested in participating, email her at bakesale@thetomatotart.com.  If you would like to know more about the bake sale, visit her website for details or check out this article from SF Weekly.

I have started preparing my example goodies, and I’m super excited about sharing them with you!  First on the list is Whole Wheat Vegan Banana Bread.  I know what you are thinking: “whole wheat? vegan? Sounds too healthy to taste like anything other than cardboard.”  Well, you’re wrong.  It’s amazing!  This particular banana bread is based on Ezra Pound Cake’s Banana Foster Bread, which is by all means delicious and surprisingly low in fat for a dessert, but I wanted to make it even healthier due to a movement in our house to eat better, so whole wheat and vegan it is.  The first time I made this bread I fell in love with it.  I now feel the need to make it about once a week.  Sometimes I even make two and store one in the freezer in case I’m having a banana bread emergency and just need to eat some…right now.  It is amazing hot, cold, even frozen (yes, I admit I have eaten banana bread right out of the freezer.  I have no self control.)  If I’m feeling really naughty, I spread it with some Irish butter or even some cream cheese, however that negates the Vegan and healthy aspects of this bread, but it’s oh so good.

I will be donating two loaves of this amazing Vegan Banana Bread to the online bake sale.  Drop by on the 30th and bid, so you too can fall in love with its banana-y goodness!

Here’s what you need:

(makes two 9 x 5 loaves)

3 cups mashed bananas (about 6)

2 cups brown sugar, divided

1/2 cup dark rum

2/3 cup vegan yogurt such as  Whole Soy

4 Tbls ground flax seed plus 6 Tbls water (this is the egg substitute)

3 cups whole wheat flour

1/2 cup ground flax seed

1 1/2 tsp baking soda

1 tsp salt

1 tsp ground cinnamon

2 Tbls brown sugar for sprinkling

Here’s what you do:

In a large skillet, combine bananas, rum, and 1 cup brown sugar.  Cook over medium heat until it starts to bubble.  Remove from heat and let cool slightly.

While this is cooling, combine the 4 Tbls flax seed with 6 Tbls water in a small bowl and whisk until the mixture thickens.  It should be the same consistency as beaten eggs.

In a large mixing bowl, combine banana mixture, 1 cup brown sugar, vegan yogurt, and egg substitute.  Beat with a mixer on medium speed until combined.

Combine the dry ingredients (minus the 2 Tbls brown sugar) in a medium bowl and add to the banana mixture.  Mix until just combined.

Pour batter into two sprayed 9 x 5 inch loaf pans and sprinkle with the 2 Tbls brown sugar.  This gives the top a nice sheen and a little crunch.  Bake in a preheated 350 degree oven for 50 minutes to 1 hour or until cake tester comes out clean.  Cool on wire rack for about 10 minutes before removing from pan.


Online Bake Sale for Japan! March 19, 2011

Filed under: baking — dulcisserenus @ 1:11 am
Tags: , , , ,


On March 30th I’ll be participating in The Tomato Tart’s online bake sale to benefit earthquake and tsunami victims in Japan.  Early next week I will be posting pictures of the goodies I will be donating.  So far the list includes: homemade jams, vegan banana bread, and vegan shortbread cookies.  Depending on how much free time I have, I may make some jam thumbprints as well, and maybe some sort of candy, perhaps buckeyes.  Please stop by thetomatotart.com on Wednesday, March 30th and bid on some delectable goodies and give to a really good cause.